Welcome Earthlings and Visitors
I would like to offer a "Weekly" image that you might enjoy for a computer screen background or if you are inclined to paint, perhaps a starting point for a new artwork. We do have pretty incredible sunrises, alpen glow on Mt. Baker and birding photos during each week.
This blog is linked to my three websites: www.TakeYourBestShot.com www.GeddesPhotography.com and www.SportSketch.com. TYBS is dedicated to my
sports photography business, Geddes Photo to the fine art, "wet canvas work" and our family and SportSketch to the sketches I create for many many clients all over the US.
If you have a question about any of these websites or the products offered within those sites, feel free to post that here and I may address that question in a future post or shoot you an email if the question is time sensitive.
Image of the week, click for screen size image:


Quick Guide for Image Adjusting
Simple Soft Edge Gradient Filter in PhotoShop:

Click thumbnail for screen size image to download and use in this exercise.

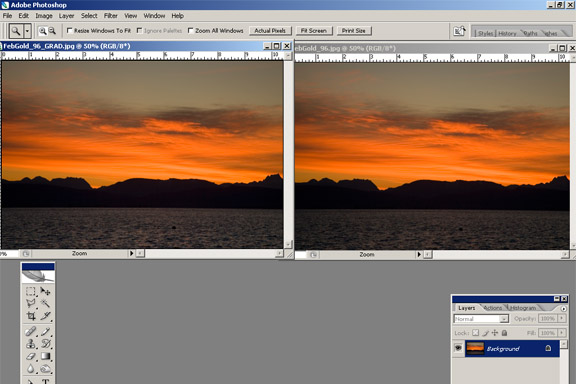
In this image, I would like the water to be slightly more brighter and a slightly lighter mountain range as well.
Here's how:
1. Duplicate your image and close the original. On the layers palette shown
to the right, drag the background layer to the "double" icon on the
the bottom of the palette. Next to the trash can. This creates a "background
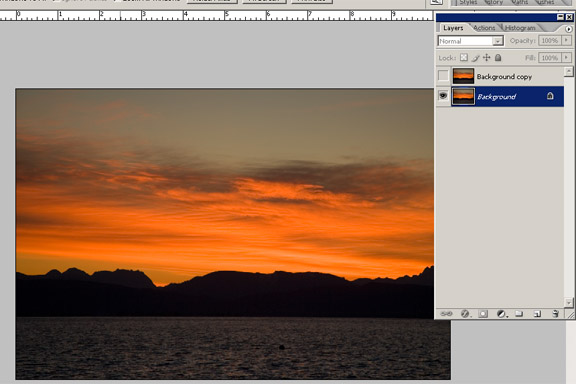
copy layer" above the background, as shown. Turn off the top
layer by clicking the "eye" in the column to the left of the background copy
layer. You are now looking at only the original layer.

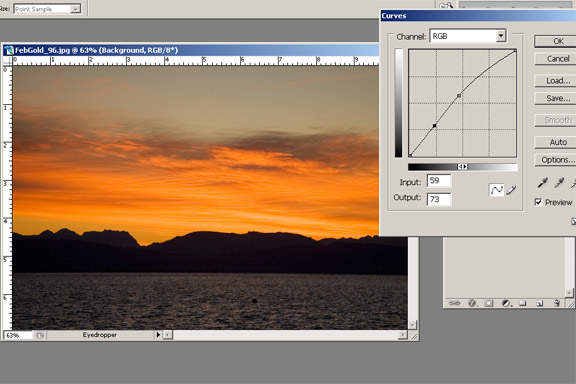
2. With the bottom layer visible as described above, select from the top menu
items the "Image" pull down menu. Click "adjust" scroll down to curves.
Place the cursor on the middle dot - click and hold - then pull diagonally
toward the top right corner, as shown. Select a second spot on the arc created
by your action and repeat but very gently. The first adjustment is for exposure
(lighten) and the second one is for contrast. Adjust to suite your taste.

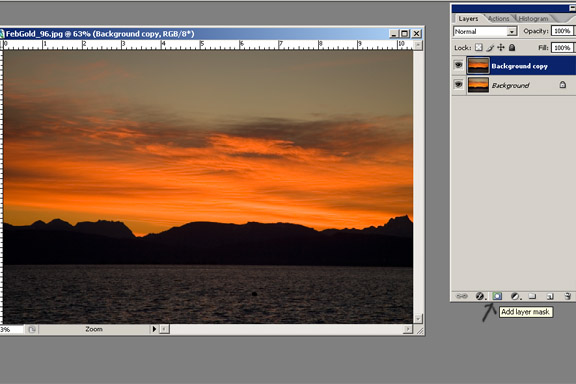
3.Now click the eye back making the top layer visible again. You should
notice the image getting darker by switching this layer on and off.
With the top layer selected, click the "layer mask" button on the bottom of the
layers palette, as shown.

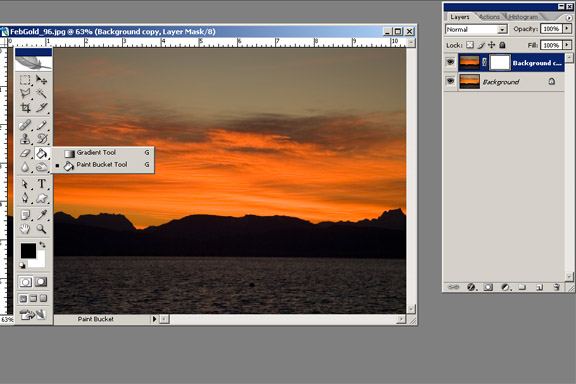
4. With the layer mask created and the top layered still highlighted, select
the gradient tool from the tools palette. This sometimes resides under the paint
bucket.
While on the tools palette, also click the small black and white icon next to
the large colored squares. This will change the squares to white on top and
black
beneath. Click the exchange
button next to the squares (top right). This will change the color order to
black on the top and white on the bottom.

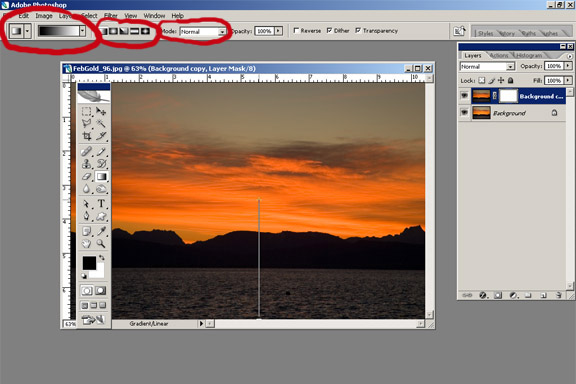
5. Take the gradient tool out to the image. Be sure your gradient is the
"feather" as shown. If you need more of the effect directed at the
shaded or shadowed
portion of the image, select "shadow" from the MODE settings, (third circled
from left). Click the bottom of the image and pull the gradient tool upward. Try
to keep a straight line by holding down the cursor and moving it side to side.
This may take a couple attempts to get what you are pleased with. Keep trying
until you get what you are after... You can even play around with it!

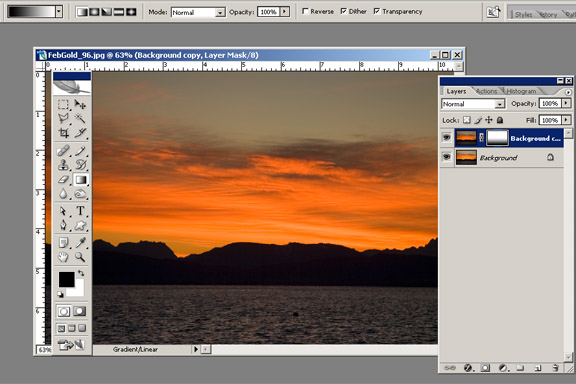
6. Notice the layer mask on the layers palette. the black area shows where
the black paint feathered across the photo's top layer. This allows that portion
to
reveal the bottom layer. The layer that we adjusted. So the top sunrise sky
stays as photographed and the bottom reveals the lighted bottom layer.

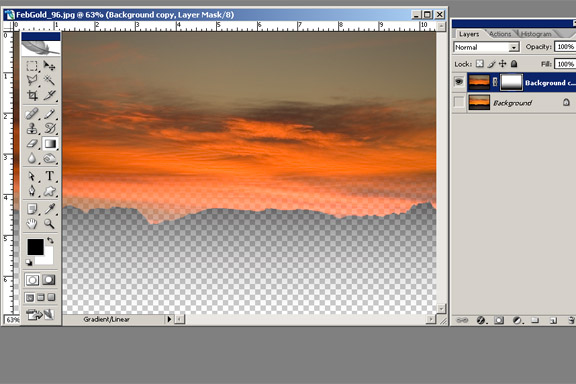
7. By turning off the bottom layer's visibility you can see the mask effect.

8. The subtle difference (which could be much more dramatic if we had
adjusted the exposure more in the first steps). The trick here is realizing that
the
image has been adjusted and that adjustment is feathered in the same way a
gradient soft sided filter works. In other words, I could have used a Signh Ray
1 stop SS filter when I photographed this image and accomplished the same thing.
That said, I am a strong believer in creating images that are correct when
shot. DO NOT leave the creation of great images up to PhotoShop. This is a
rescue mission, not the normal work flow! But it's a good one!